Laying cables sounds easy – but it isn't always
A photovoltaic system on your own roof is one of the best investments you can make as a homeowner. But between installing the modules and generating the first self-produced electricity lies a critical step: cable routing. This is where most mistakes happen – often invisibly and with consequences that only appear years later.
Here are the 5 most common mistakes when laying PV cables – and how to avoid them from the outset.
Mistake 1: Laying cables over sharp roof edges
Roof tiles, slate, and trapezoidal sheets all have one thing in common: sharp edges. If a PV cable is routed unprotected over such an edge, it will fray over the years. Wind minimally moves the modules, temperature changes expand and contract the cable – all of this creates friction exactly where the edge is.
The solution: At every point where the cable touches a roof edge or is routed through an opening, mechanical protection must be provided. A cable gland with an abrasion-resistant sleeve permanently protects the cable – without rework.
Mistake 2: Sealing the roof penetration "somehow"
A hole in the roof through which the cable runs must be permanently sealed. Many DIY enthusiasts use construction foam or normal sealants – this works for a short time, but not long-term. UV radiation, frost, and temperature fluctuations cause many sealants to crack after a few years.
The solution: Use a cable gland that is designed for roof mounting. These are designed to permanently protect the cable from abrasion at the tile edge and to guide it cleanly through the tile level – without regular inspection or repair. Proper tile roofing ensures rain impermeability.
Mistake 3: Planning too little cable length
Cables that are too tightly stretched will tear due to movement or expansion from heat. In addition, a tightly stretched cable causes problems with roof penetration: it pulls on the entry point, stresses the seal, and in the worst case can pull the penetration out of its position.
The solution: Always plan a buffer – at least 20-30 cm extra for each penetration point. The cable must not have any mechanical tension at the penetration.
Mistake 4: Fixing cables without strain relief
Immediately after penetrating into the interior of the building, the cable must be secured. Without strain relief, the entire weight of the cable hangs at the penetration point – this stresses the seal and ultimately leads to leaks.
The solution: Fasten the cable immediately after penetration with a cable clamp or strain relief clamp. This takes the load off the penetration and protects the seal. Our guide to fastening solar cables on the roof shows how to fix the cables abrasion-free even on the open roof surface (correct distances, UV-resistant clamps).
Mistake 5: Considering cable protection "optional"
A PV cable is built for outdoor installation – robust, UV-resistant, designed for high temperatures. But "robust" does not mean "invulnerable". Without mechanical protection at the penetration point, the insulation can be chafed through within a few years. The result: insulation faults, warning messages in the inverter, and in the worst case, a fire hazard due to arcing.
The solution: Do not treat cable protection at the penetration as an optional extra, but as part of the basic installation. A good penetration with abrasion-resistant cable protection costs little – damage later costs much more.
In short
The five mistakes at a glance: laying cables over sharp edges, poor sealing, too little cable length, missing strain relief, and no cable protection. If you get these points right from the start, you won't have to worry about your cable routing for 20 years.
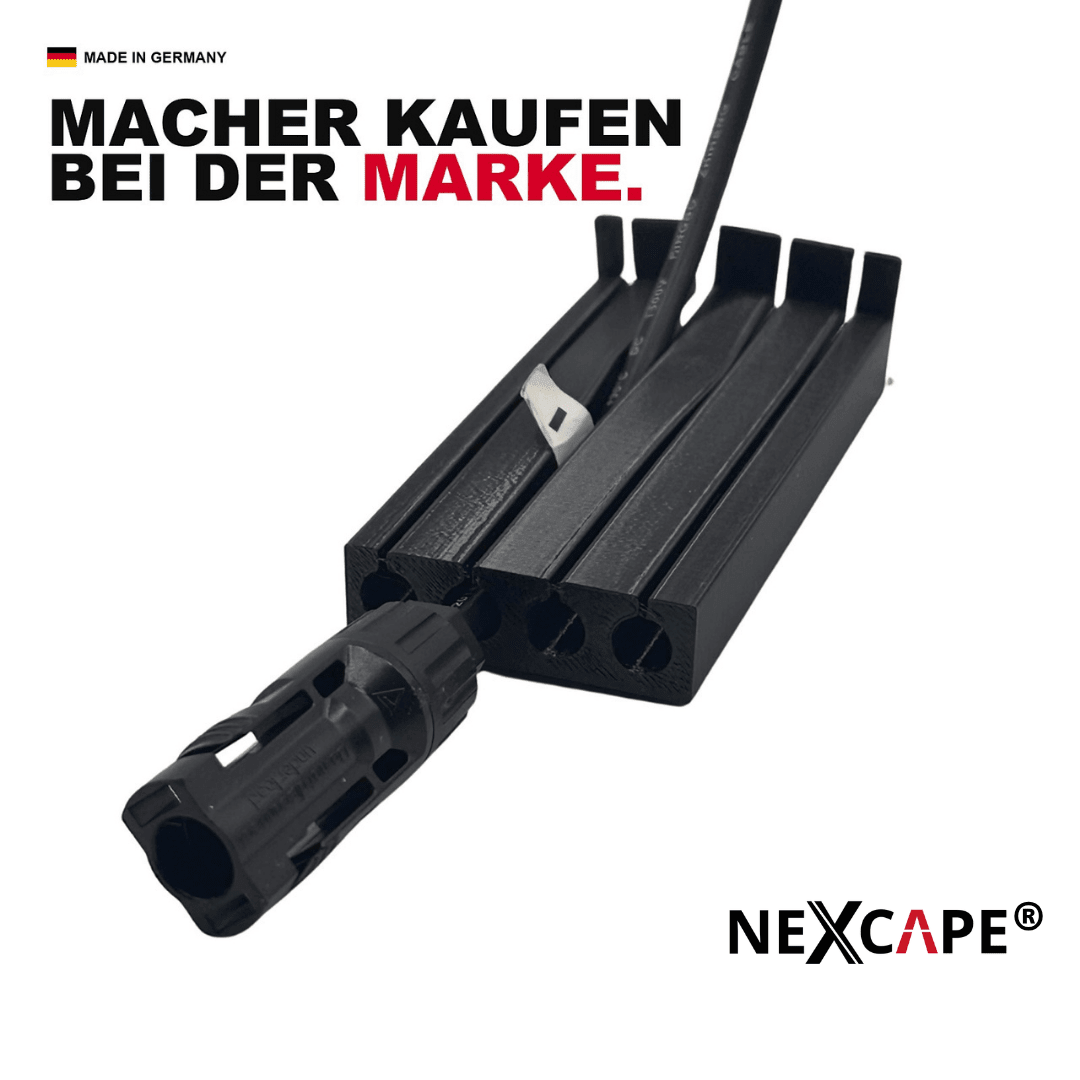
Are you currently planning your PV installation or do you want to retrofit an existing system? In the NEXCAPE® shop you will find cable glands with integrated abrasion protection – specially designed for use on pitched roofs.
The most common avoidable mistake is a lack of cable protection at the tile edge – our PV roof penetrations (abrasion protection, TPU) specifically prevent this.
Matching PV roof penetrations from our manufacture: All PV roof penetrations · DIY variant without MC4 removal · 125 mm for the Frankfurter Pfanne · 150 mm for almost all roof tiles
Do you want the whole topic in one place? Our complete guide: Safely routing PV solar cables through the tiled roof (2026) bundles size selection, installation, material science and FAQ – with all detailed instructions linked.